Time-lapse landscape photography is a great way to capture and convey changes in nature over time. With time-lapse photography you can show everything from the movement of clouds and stars to the gradual changes in light across the landscape. As awe-inspiring as the final product can be, capturing the perfect time-lapse requires both technical knowledge and creative intuition. In this post let’s explore some essential tips to help you create stunning, seamless shots. With these techniques, you’ll be well on your way to creating awe-inspiring time-lapse videos.
Time-lapse photography involves capturing multiple images over a period of time, with each image representing a single frame in a video. When stitched together, these frames create a video that condenses time, allowing you to watch slow events unfold at a rapid pace. Time-lapse photography focuses specifically on natural settings, where changes in lighting, weather, and celestial movement play out in front of your lens.
The foundation of any successful time-lapse video starts with a compelling location and subject. This initial step will affect the entire composition and appeal of your final product.
Tips for Choosing the Best Location:
The timing and weather conditions can make or break your time-lapse. Different times of day and various weather patterns will affect lighting, mood, and movement within the frame.
Timing Tips:
Weather Tips:
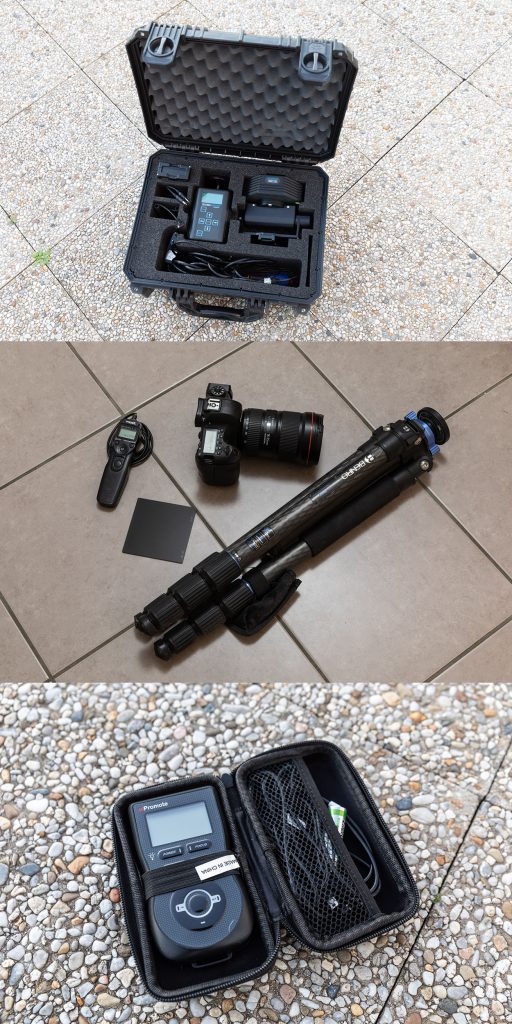
While a good DSLR or mirrorless camera is crucial, there are other pieces of gear that will significantly enhance your time-lapse landscape photography.
Essential Equipment:
Choosing the right interval and shutter speed settings is crucial for capturing smooth, natural movement in your time-lapse video. This balance will depend on your subject and the speed of its motion.
Interval Tips:
Shutter Speed Tips:
My personal opinion is that DSLRs are generally better for doing time-lapse landscape photography. The battery life tends to last much longer than mirrorless cameras.
However, if you are using a mirrorless camera then once you have set up your camera and framed the shot you want, then turn off things such as the back screen as well as the viewfinder otherwise it will eat the batteries a lot quicker.
This is where a battery grip comes in useful as it can help you elongate the battery life more than you would have with a single battery.
As mentioned previously, be sure to invest in an intervalometer as although many cameras now have them built in, the software that runs them eats up precious battery life.
On your lens ensure that once you’ve focussed and turned off the auto-focus you also turn off the image stabilization (IS) as it will ruin your time-lapse sequence when used in conjunction with a tripod.
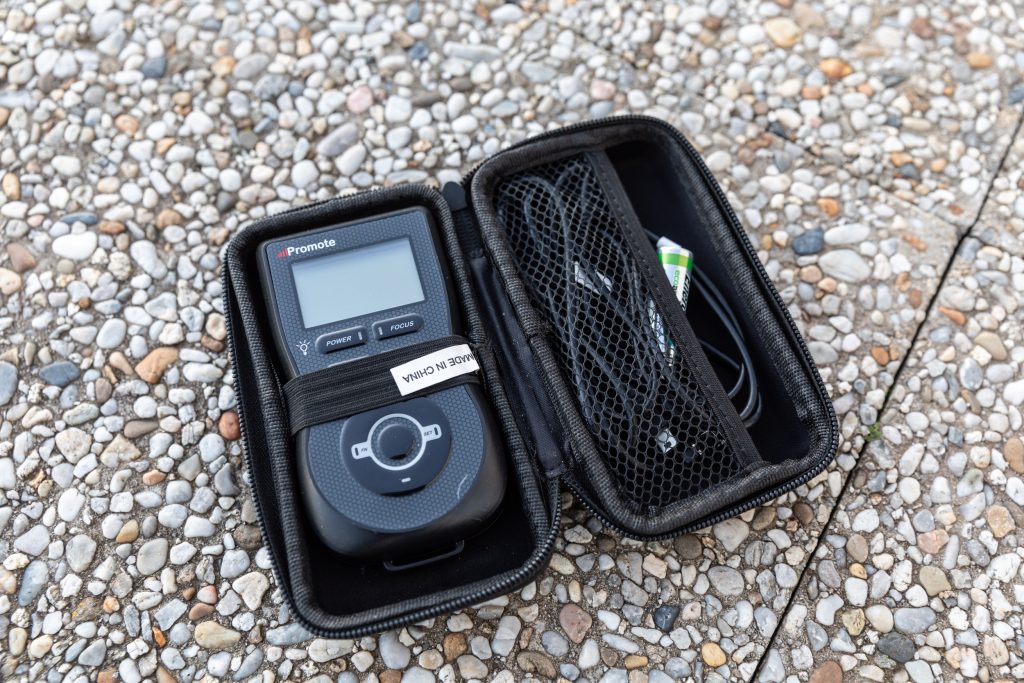
When you are doing a time-lapse sequence the exposure levels can vary a lot as clouds move over the scene. You can get away with changing the exposure on the camera but using a unit such as the Promote Control can help to change the settings such as shutter speed without having to touch the camera which in turn will introduce camera shake.
Once your sequence is finished and you are back at the digital editing suite then Adobe Lightroom combined with LRTimeLapse will help smooth out the changes in light levels that have been flowing through your scene.
Aperture flicker is a common problem too when shooting time-lapse sequences. One trick for Canon users is to use the lens twist method. You simply hold in the depth of field preview button whilst ever so slightly unlocking the lens. Keep an eye on the aperture setting to ensure it is still reading out the required aperture.
The lens twist method basically keeps the aperture closed down between each shot. Ordinarily when shooting, every frame will be ever so slightly different with the exposure. It might not be visible to the naked eye at first but run the sequence together and you will soon start to see the aperture flicker. Again, this is where software such as LRTimeLapse can help to minimize the effects.
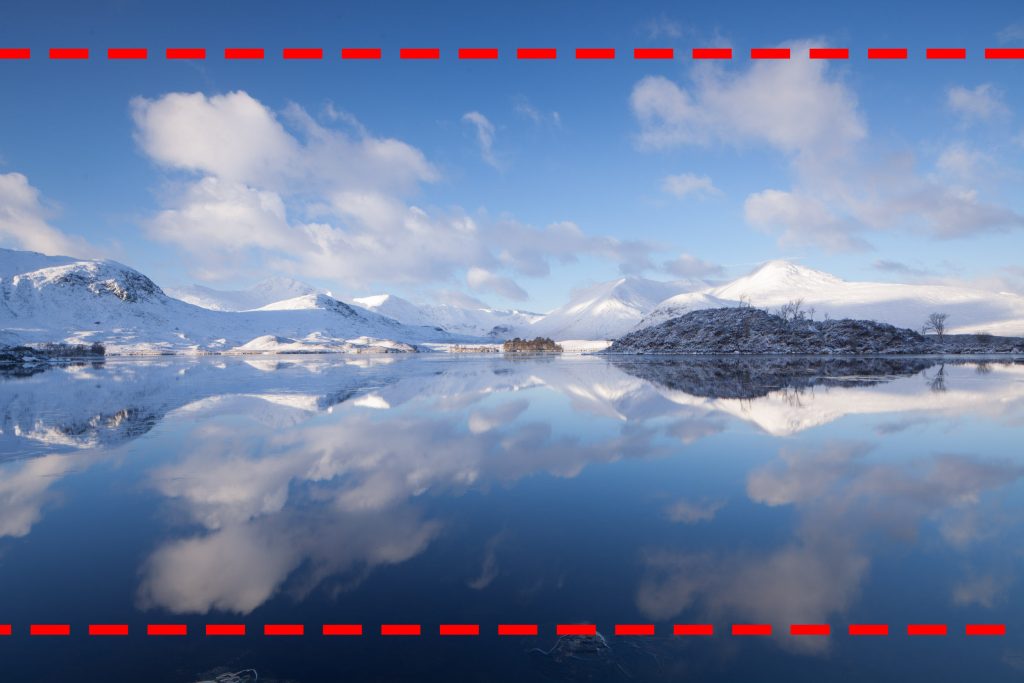
The world of motion is in 16×9 so be sure to set your camera on this crop factor. One of my early time-lapse landscape photography sequences was framed as 3×2 instead of 16×9 and it left little room to properly edit it for selling via a stock library.
If you search through your camera you will find that you can set the viewfinder to 16×9 which then allows you to properly frame your time-lapse sequence. Use the same compositional rules that you would employ for your regular still image shots but just ensure it’s on 16×9.
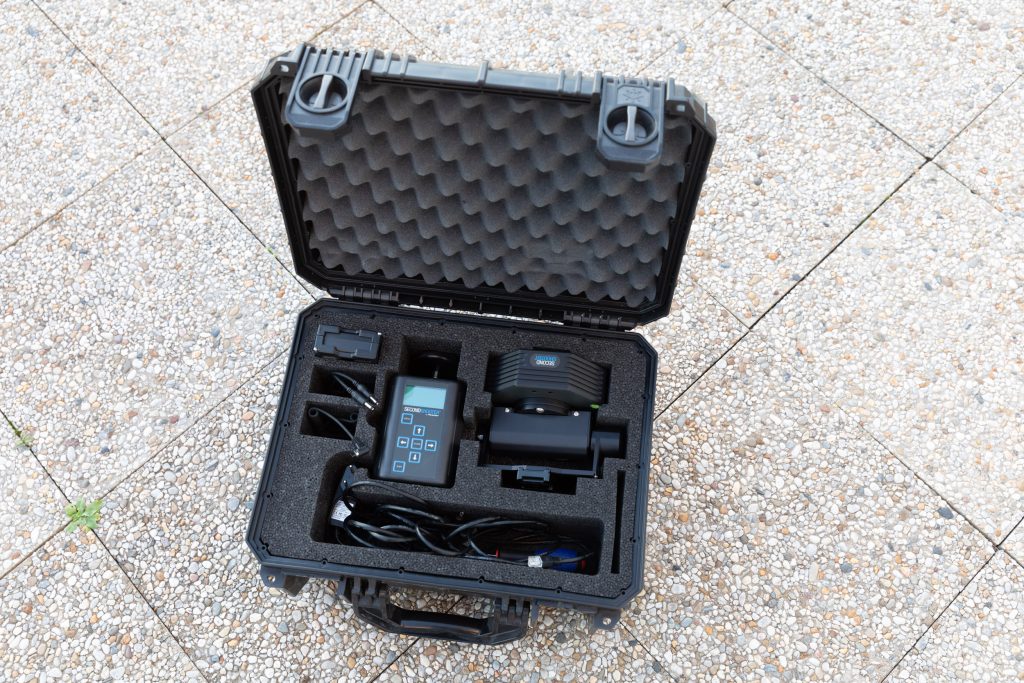
If you’re going to get serious about time-lapse landscape photography then you can consider adding motion via a motorized panning head. This will allow your camera to be panned from right to left or vice versa as well as up and or a combination of both.
Movement adds dynamism to sequences to make them visually more interesting. The downside is of course that it’s more gear to lug around which isn’t always practical.
Along with a panning head you can also go for a slider too. Combined with a panning head you can really go to town with adding dynamic motion to your time-lapse landscape photography sequences.
But again, it’s a case of practicalities and how much weight you’re prepared to lug around in order to get what you want.
Think carefully about the frame rate for your time-lapse sequences. In the film industry, there are various FPS (frames per second) that are used for a variety of reasons. Typically, you should think along the lines of either 23.976; 24; 25 or 29.97 or 30 fps.
Why is it important to think about FPS? Because if you are selling your work via a stock site such as Getty Images then the end user will be looking at a particular FPS for their project. There are different FPS that are used around the world in different countries for TV broadcasts so be aware of these and how to use them.
In the social media realm, Instagram Reels play at 30fps so if you’re creating a time-lapse sequence exclusively for Instagram then ensure you render it out at 30fps.
How many frames/ images you shoot for your time-lapse landscape photography very much depends on what you are doing and what you want to achieve.
If you watch TV and movies you’ll notice that in general, the camera switches from scene to scene every 5 to 10 seconds depending on what’s going on.
When you’re out in the field I would suggest that you shoot a minimum of 240 frames which can be rendered as 10 seconds of footage at 24fps. If you have 12 different sequences you can create a small 1-minute time-lapse film with this.
If you’re creating time-lapse landscape photography sequences for submitting into stock footage libraries then you should be shooting a minimum of 360 frames which gives 15 seconds worth of footage at 24fps. This then gives an editor ample choice from which to choose the perfect sequence within the sequence for their project.
A few years ago, CBS Criminal Minds Without Borders used two of my time-lapse sequences from Florence. The sequences were originally around 30 seconds in total but when used within the episode the editor had chosen a mere second from each whilst Gary Sinise narrated over the top of it.
You may wonder if it’s worth putting the time and effort into it but I can assure you that it definitely is.
Stability is key for time-lapse landscape photography. Even the slightest movement can ruin hours of work, so take extra precautions to keep your camera steady.
Stabilization Tips:
Post-processing is where all your hard work really comes together. To put your time-lapse landscape photography together as a sequence then you’ll need to use software like Adobe Lightroom in conjunction with LRTimeLapse. This will give you much more control so that, you can enhance colours, smooth out transitions, and correct any exposure inconsistencies. LRTimeLapse can also help smooth out the inconsistencies introduced by the aperture between each shot.
Post-Processing Tips:
Time-lapse landscape photography is an open field for creative experimentation. Try different techniques to develop your unique style.
Creative Techniques to Try:
Time-lapse requires patience. From scouting locations to waiting for the right conditions and capturing hundreds of frames, this genre of photography demands dedication.
Patience Tips:
With the right equipment, planning, and patience, time-lapse landscape photography can transform everyday moments into cinematic marvels. Whether you’re capturing clouds drifting over mountains, the movement of stars, or the changing light of a sunset, these time-lapse landscape photography tips will help you refine your craft. Remember, practice is essential, and each session will bring new learning opportunities.
So, pack your gear, choose an inspiring location, and let the natural world reveal its hidden beauty through your lens. With dedication and creativity, you’ll soon be creating stunning time-lapse landscapes that captivate viewers and showcase the majesty of time in motion.
And if you’re interested in commissioning me to create time-lapse sequences for your business then please get in touch. In the past I’ve created time-lapse clips for Visit Britain and Cologne Tourism.